Saturday, November 24, 2012

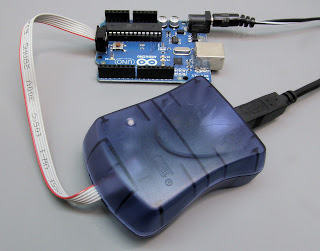
Using AVRISP mkII with Arduino


Using Arduino's built-in serial bootloader to upload and run programs is convenient, but a dedicated programming device like the AVRISP mkII can:

  • Program blank (bootloaderless) AVR chips. 
  • Reduce the time required to upload sketches to the Arduino.
  • Save the program memory required by the bootloader. 
  •  Let you program minimal-hardware -inos without a USB/serial adapter. 
  •  Eliminate the issues involved with sharing a UART between the bootloader and a peripheral (such as our serial displays).

This note will offer a few hints and tips for getting started with the AVRISP mkII with Arduino, since this is different from using it with Atmel's development software.

Tuesday, November 13, 2012

Cutouts for LCD/OLED Mounting--Hot Knife vs Razor Saw (Updated)

Update: This note originally covered only the popular hot-knife method for hand-making display cutouts, but we recently tried again with an 8-dollar Zona Saw. Won't keep you in suspense: The razor-sharp saw cuts plastic faster and better than the hot knife. Details here.

Hot Knife Method


The cheapest, simplest One tool for making a display cutout in plastic is a hot knife, like the Weller SP23LHPK soldering kit, which comes with an adapter to attach Xacto-type blades.

Using this tool to cut openings in ABS speedy boxes (like this Wisher H2851 we used) requires some technique to overcome the limitations of the crude tool. We experimented, cutting dozens of holes in several boxes, in order to fine-tune the procedure. Here's what we found:

Friday, November 2, 2012

Test Driving Front Panel Express

Front Panel Express manufactures custom panels and enclosures for electronics. We recently test-drove their service by making a sample panel to mount our GLO-216Y and BPI-216L displays using the BEZ-216 self-adhesive faceplate and hardware. The whole process was smooth and even fun, and resulted in the panel shown at the right.

The panel is 2mm anodized aluminum (bronze finish) with custom screw holes and cutouts to precisely fit the displays. It cost $41.98 plus $4.95 for ground shipping. It took 7 days from submission of the file to completion of the job. Here's how it went:

Thursday, November 1, 2012

Mounting an LCD or OLED

This is the first in a series of notes on mounting LCDs and OLEDs. This installment will cover the basics; next time we'll walk through the process of using Front Panel Express to design and manufacture a simple LCD/OLED mounting panel.

Our displays end up in applications ranging from scuba rebreathers to mining gear to car-door testers to (not kidding) bedpan washers. This makes it tough to recommend a one-size-fits-all answer to mounting and enclosure issues. But there are a few constants:

Don't go naked. Displays must be mounted behind a protective, transparent window (examples) to prevent damage from curious fingers, electrostatic discharge, dirt, solvents and moisture. You've seen a lot of projects online that leave the display naked and exposed to the world, but chances are the sole user of those devices is the maker. Other users cannot be expected to be as careful of or kind to a display as the person who bought it (and would have to replace it if it gets broken).